

Building a tutoring course students actually use
A course is not a folder of worksheets. How to turn what you already teach into short lessons with worked examples and practice, and decide who gets them.

Most centres already have a course. It lives in a shared drive, it’s called something like “Algebra FINAL (2)”, and it holds more PDFs than anyone has counted, in an order only the person who saved them can follow. Students don’t open folders. They open the one thing a tutor sent them last night, if that.
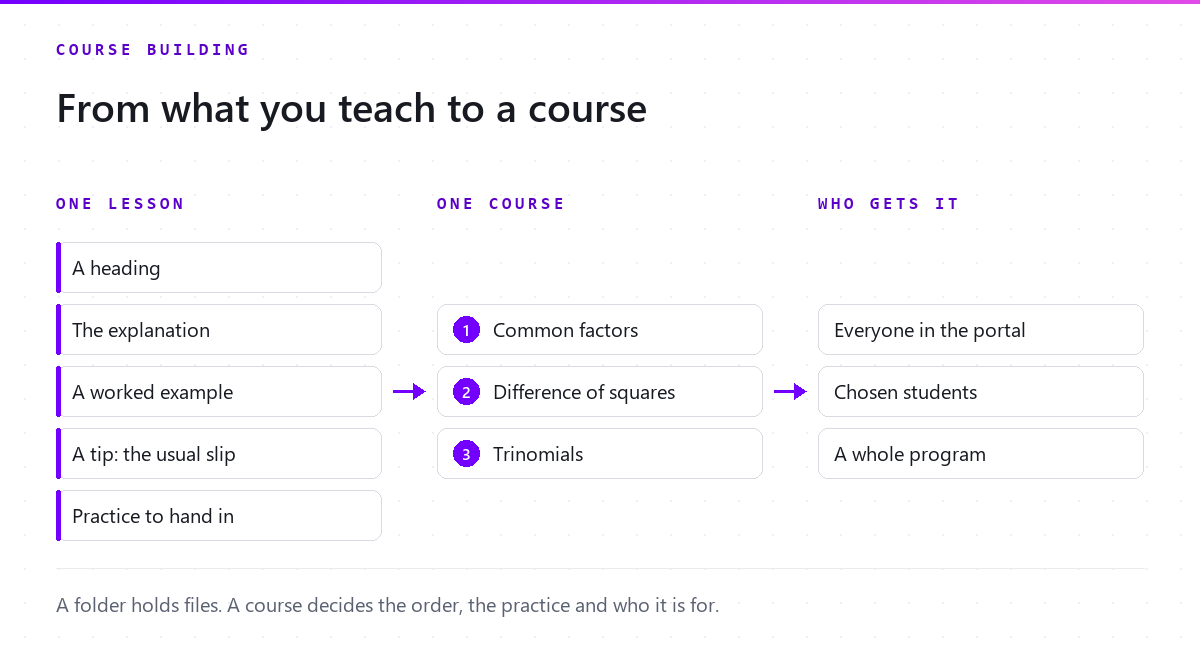
A course is different from a folder in three ways: it has an order, it makes the student do something, and it knows who it’s for. Here’s how to build one out of what you already teach.
Start from what you already explain every week
You don’t need to write a curriculum. You have one: the explanations you give over and over, the example you always reach for, the mistake you can see coming before the student makes it. Your first course is those, written down in the order you teach them.
In Québec it helps to line them up with what school is doing. The Québec Education Program publishes the official programs of study for each level, so a course that follows the term’s units is one a student can use the week a test is coming, not three weeks after it.
One lesson, one idea
A lesson a student can follow alone is short, and it does one thing. Build every lesson the same way, so students learn the shape once and spend their attention on the content:
- A heading that names the idea: “Common factors,” not “Lesson 3.”
- The explanation, in the words you’d use at the table.
- A worked example, every step shown.
- A tip for the slip you know is coming.
- Practice to hand in: a few questions that make the student use the idea.
The worked example earns its place. Research on learning from examples (Atkinson and colleagues, 2000) ties worked examples to the early stages of learning a skill, which is exactly where a student is when they open a lesson on something new. Show the move first, then ask for it.
End with questions, not a summary
The natural way to end a lesson is a recap to reread. It’s also the weakest. In a well-known experiment, Roediger and Karpicke had students either restudy a passage or take recall tests on it. Restudying did better five minutes later. Testing did better two days later and a week later, even though restudying left students feeling more confident. Their conclusion was that testing is a way to learn, not only a way to check.
A large review of study techniques by Dunlosky and colleagues came to the same place from a different direction. Of the ten techniques it weighed, only two earned its high utility rating: practice testing, and distributed practice, which means spreading practice out over time. Rereading and highlighting were rated low. So end each lesson with three questions, and bring a few of them back two lessons later. A course that asks students to remember beats one that asks them to reread.
Decide who gets it
A course for one student is a plan. A course for a program is a curriculum. Most centres need both, which is why who gets it is part of the course, not an afterthought: everyone in the family portal, only the students you choose, or every student enrolled in a program.
Two habits keep it tidy. Keep a course in draft until it’s ready, so nobody lands on half a lesson. And before you publish, read it the way a student will, start to finish, on a phone.
If you sell it, sell what’s yours
If you sell a course on its own, or fold it into a plan, build it from material you wrote. In Canada, copyright gives the owner the sole right to produce or reproduce a work or a substantial part of it, so pages photocopied from a commercial workbook are not yours to package and sell. This isn’t legal advice. If you’re unsure about a source, ask the publisher or a lawyer. Your own explanations and examples are the safest thing to sell, and the most distinctive.
The bottom line
A course is your teaching, in order, with practice built in, given to the right students. It doesn’t have to be big. One good lesson that students use beats a folder they never open.
So, Monday: pick the explanation you give most often. Write it as one lesson: a heading, the explanation, a worked example, a tip and three questions. Give it to the students who need it this week, and write the next one once they’ve used it.
In Pillar OS, courses live in the Library. A lesson is built from heading, paragraph, list, example and tip blocks, with a video link, files and homework attached, and Preview shows it exactly as a student will see it. Each course goes to every portal student, to students you choose or to a program, and stays in draft until you publish it. More on the courses page, and on getting that practice back corrected in homework between tutoring sessions.

Nelly Kallini · Co-founder
A high school teacher who has spent years tutoring, so she has been on the receiving end of nearly every feature here: the 8am reschedule, the progress report due tonight, the parent asking whether any of it is working. She writes the operations side of the blog.